A Productive 6 Weeks
Wow, I can’t believe it is now 6 weeks since my last post. BUT, I have been busy getting the truck (and Suzi) ready. Dirty drizzly rain this morning, so here comes an update.
Truck Body Work
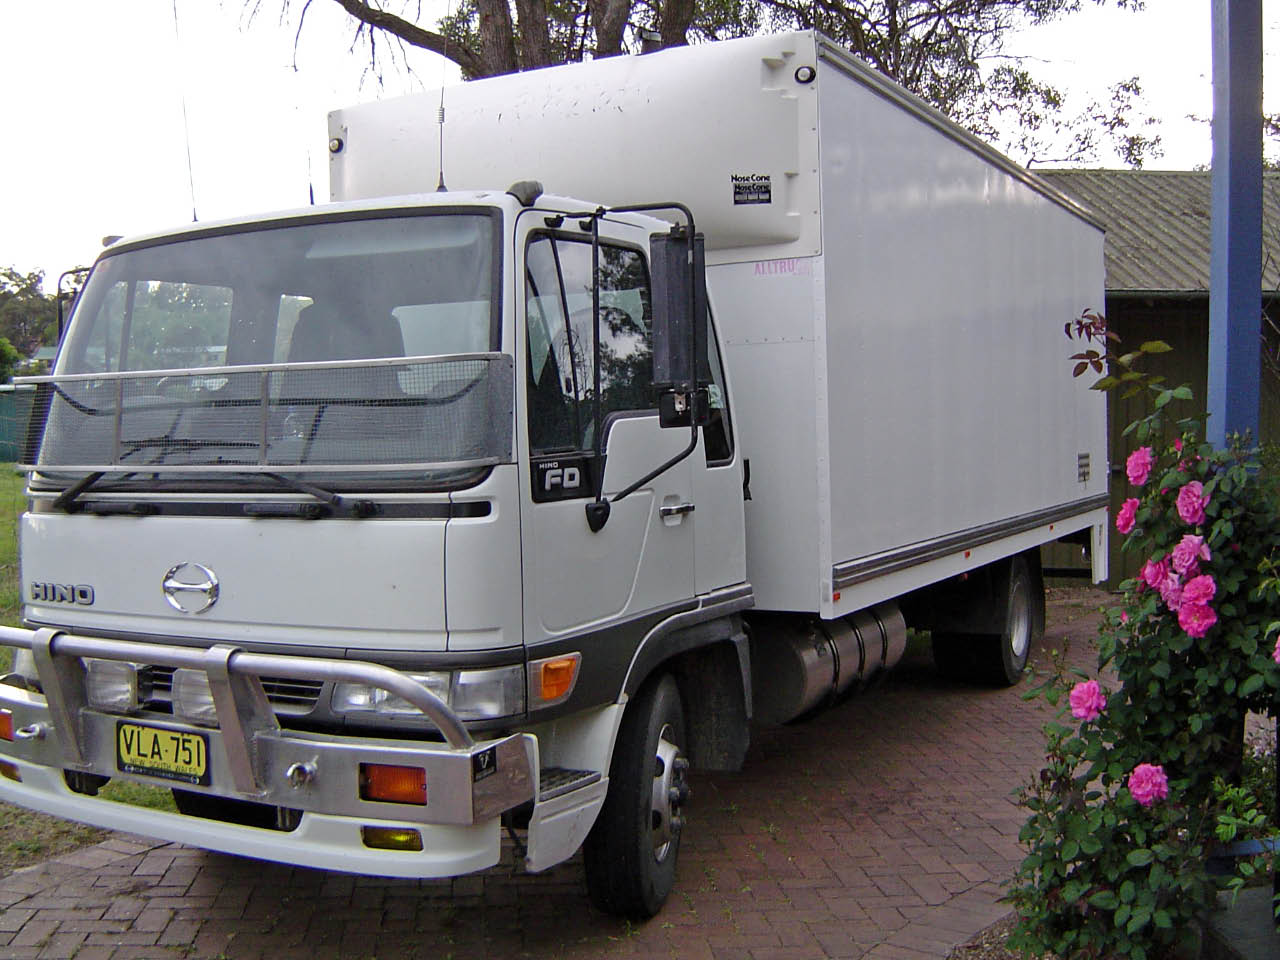
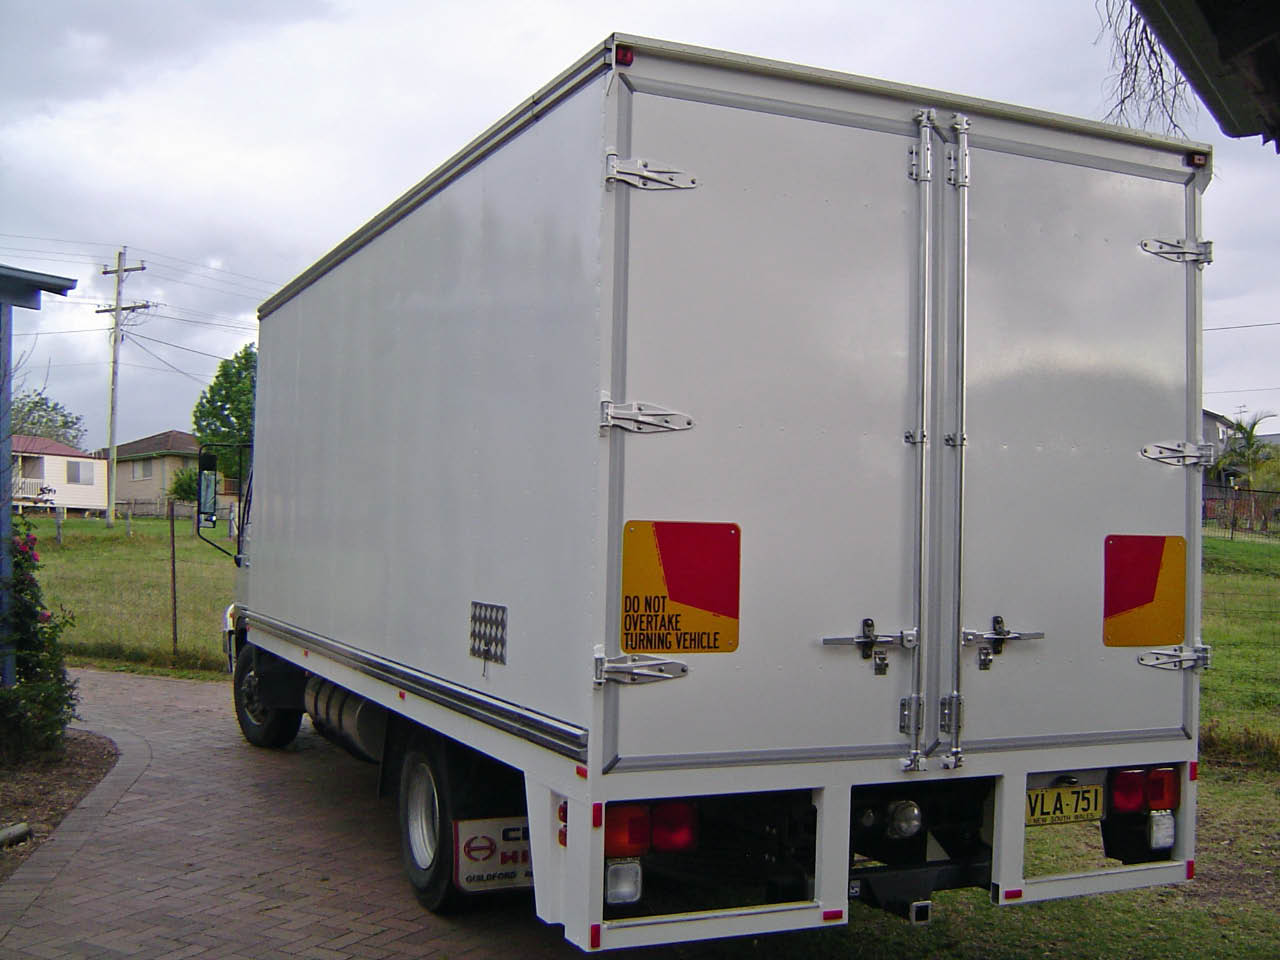
The truck body has been repainted. Trims were removed and given a bit of spit and polish. The rear doors have new seals and new safety signs. The rear lights all have new lenses, as after 10years in the open air most of them had faded badly.
Truck Wiring Work
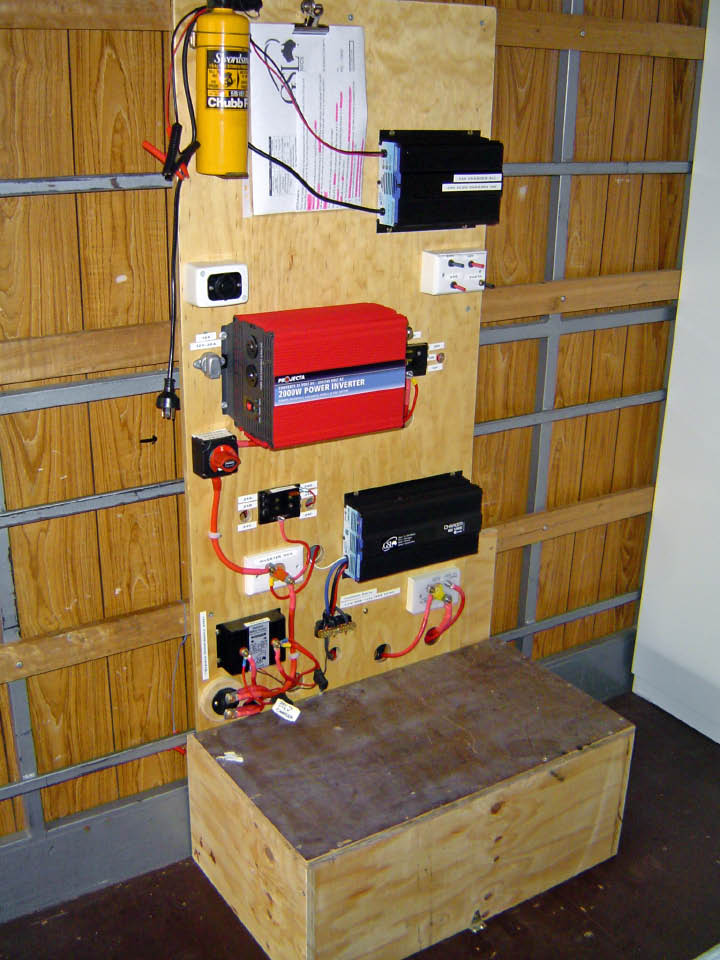
A Power Board has been installed in the body of the truck, just above where the truck batteries are mounted. The truck (start) batteries are 24volt. I have added an extra set of 24volt (house) batteries and a Dual Battery Isolator. A ‘smart’ Charger runs off these batteries to charge 12 volt batteries, one in the truck and 2 in the caravan (and Suzi’s battery if need be). I have also added a 2000watt 240volt Inverter that is also run off the 24volt house batteries. 24volt fluro lights have been installed in strategic places in the truck body. Another ‘smart’ Charger can charge all or some of the batteries from a 240volt supply.
Info For the Technical Types
Approx $4K (at cost) was spent on auto -electrical items. It is good having contacts in the trade. As I am a Technician by trade I did the design and wiring myself. The reference book “Motorhome Electrics” by Collyn Rivers was a welcome guide, especially in selecting cable sizes. I couldn’t believe just how expensive copper cable has become – I spent over $1K just on cable, and there is not much left. According to Collyn’s book a similar set-up would cost between $12K and $15K if done professionally, so I am pretty happy with the savings. I’m also very pleased with the end result.
GSL staff were very helpful. I am very impressed with their products. And made in Sydney. Their web site www.gsl.com.au is currently being upgraded. As the inverter in the truck will only get very occassional use I was happy with a Projecta model – Chinese made to Aussie specifications, and priced accordingly.
The fact that I could get these brands at cost did have some influence on my decisions. However I did make sure the gear could reliably do what I wanted.
Items Installed on Power Board in truck body.
GSL Dual Battery Isolator – cuts out at 23.6V so the Start Battery can’t be drained too low. I have installed a bypass switch that quickly allows me to parallel the Start and House batteries if a ‘jump’ start of the truck is needed.
GSL 24V to 12V Switchmode Battery Charger – 60amp output. Keeps House 12V charged, and caravan batteries when connected. Most 24 to 12 inverters will not properly charge 12volt batteries. This unit can put out up to 14.6V, floats at 13.5V and has a 23.0 low voltage cutout so it won’t totally flatten the 24V House batteries. One issue was that this Charger needed a battery across its output at all times, thus the 12V House battery in the truck. Previously an inverter had been installed in the dash of the truck for CB Radios, Alarm, Phone, CD AM/FM radio, etc but as it has a high residual current draw I was happy to remove it altogether. Also the truck 12volt wiring was a bit of a mess so I took the opportunity to tidy it all up.
GSL Auto Select Battery Charger – 240V to 12V or 24V @ 20/10amps. One of the new style of chargers with 4 stage output. This unit is impressive. I have installed a test/charge point just below where I have mounted this charger. It can charge all three batteries at once (using the 24V to 12V Charger) or it can charge the House Batteries together (24V & 12V) or it can charge the 12V on its own.
Projecta Inverter IM2000-24 – 24V input, 2000watt output (4K peak). It can run all my tools except the welder and the big angle grinder.
Also, on the power board are 12 and 24 volt distribution fuse panels, 12 and 24 volt outlets and fuses for all heavy current connections.
In cab wiring work
I installed a 12 volt fuse panel into the dash, along with a 12 volt accessory relay.
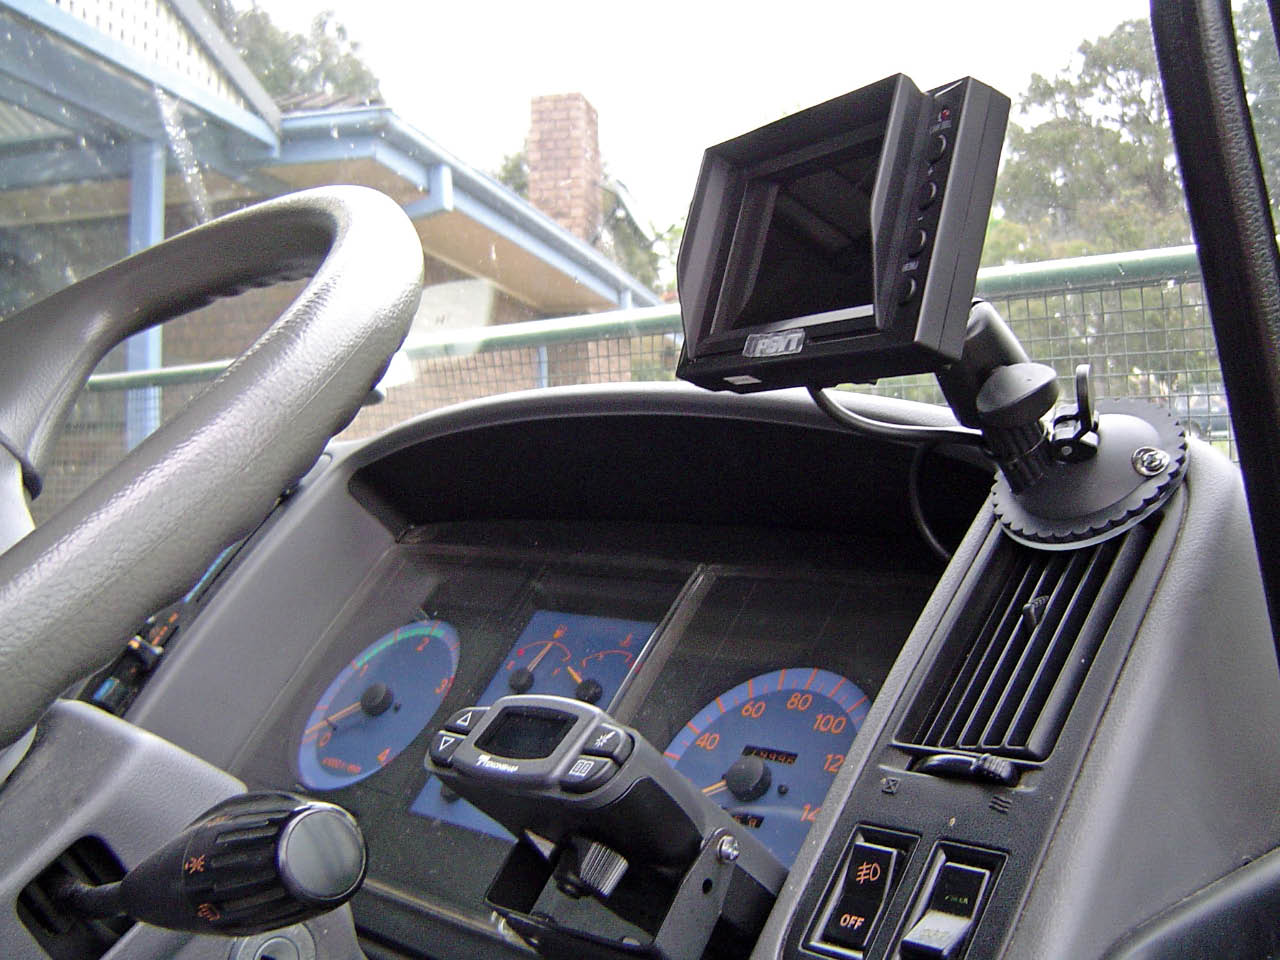
Tekonsha P3 Trailer Brake Controller – nobody makes a 24 volt brake controller as yet (GSL are working on one). The P3 is a new model, it can handle up to a quad-axle trailer and the price was right. (Our van is tri-axle). As it can draw 30amp and output up to 40amp its cabling had to be heavy duty. Relays were used to get 12volt accessory and 12volt brake lights as inputs to this unit.
Professional Safety Video System For Vehicle – 4.2 inch monitor with 2 cameras, as supplied as part of our caravan deal. 24volt input with camera one automatically coming on when reverse gear is selected. I have installed this camera on the back of the truck so I hopefully can back up to the caravan for hook-up on my own. Jan is typical of many wives and dreads the thought of giving me directions when I am backing. This camera gives a good view of 6 to 8foot behind the truck. The camera on the back of the van will give me an idea of whats happening behind us as we will be semi-trailer length when on the road.
Cabling under the Truck
All cabling under the truck is run in split conduit and is securely cable-tied inside the chassis rails. Thankfully the cable-entry into the tilting cab was well designed by Hino and they had provision for lots of addition cable entry. All connections were done inside the cabin, inside the body at the power board or right at the back of the truck.
A 7 pin socket has been installed for the caravan road lights and brakes. A heavy duty ‘Anderson’ style plug will connect the 12 volts and the camera has its own multi-pin plug.
Here endeth the technical stuff!
Layouts (so far)
Body – Inside the truck body there are cupboards right across the front. Next comes the Power Board and my workbench – its been with me for 37 years and has served me well. I few mods were necessary to fit it over the batteries but our relationship is destined to continue.
Opposite the workbench is the 820 litre water tank. On a trial run to Sydney and back, water slosh when it was 3/4 full was annoying when you stopped – you could feel the movement. So, over a beer or 6 at the Bowlo, I came up with an affordable solution. I have filled it with 120 lengths of 90mm stormwater pipe (supposed to be mounted vertically). Problem solved. A storage rack over the water tank is coming.
Next comes Suzi, with a couple of cupboards on the side, with a gap to let me get in and out when loading or unloading Suzi.
Cabin – The only obvious additions are the Brake Controller and the reverse cameras monitor. Both were installed within easy reach and where there was room.
On top of all this work to Heno I have also done a bit to Suzi, but I’ll save that for a later post.
Heard today that van is less than 2 weeks away. Got to go – I’m about to start packing our gear into the back of Heno. Giving up some of my treasures stored in the shed just in case I might need them is going to be hard.


Awesome Son Said,
October 15, 2008 @ 8:32 pm
It said leave a comment so I’m doing as I was told (like always)
Site looks good, just a couple of things – you need to update the About section, early October is gone and u haven’t left!
Are you getting the world image put on the truck? It looks like a good canvas for someone to spray their tag that all.
Rod
Wonderful Daugher Said,
October 16, 2008 @ 11:55 am
I agree, it looks too blank (although it looks tons better than the half-sanded paint job it had previously).
david Said,
October 16, 2008 @ 2:27 pm
Be patient my children; the job is not yet complete. Each side of the truck will have swirls that match those on the caravan. And on the top half of the left side rear door will be a map of Oz we can use to chart our travels.